Showing posts with label Main Dish. Show all posts
Showing posts with label Main Dish. Show all posts
Wednesday, September 28, 2011
Chicken Salsa Verde Bake
 Wednesday, September 28, 2011 |
  Posted by
momof2girls |
Posted by
momof2girls |


I have been a little sparse with my postings lately. I apologize for that. I promise my family is not starving and I still make dinner almost every night of the week. My problem is that I've been making repeats or dishes that I'm not exciting about sharing with you. I've been on a quick and easy dinner kick lately. My girls beg me to go swimming with them every afternoon which cuts into dinner making time. Well worth it I might add but it doesn't leave me much time to get creative. This is one of those great quick and easy dinners that you can throw together in no time, even early in the day if you wish. After our afternoon swim yesterday I ran inside and this was ready to bake in the oven within 10 minutes. This is how my daughter kept herself occupied while dinner was baking.

She had a great desire to make a rocket out of a cardboard box I had laying around. This was all her idea. She did a great job decorating it with her markers. I got a worked up an appetite pushing her and her sister around the dining room in this thing. I am sorry to say that this poor rocket didn't make it through the night. They don't make cardboard like they used to. Hope everyone is having a great week. Enjoy!!
Chicken Salsa Verde Bake
adapted from Every Day with Rachael Ray Magazine
2 1/4 pounds boneless, skinless chicken breasts (cooked & shredded)
2 (16 oz) jars of salsa verde or regular mild salsa
1 (15 oz) can black beans, rinsed and drained
1 onion, finely chopped
1 cup sour cream (I used light)
3 cups crushed tortilla chips
1 (8 oz) bag shredded Mexican-style cheese
Preheat oven to 375 degrees. In a large bowl mix together cooked chicken, salsa, beans, onion and sour cream.
Grease a 9x13-inch baking dish. Scatter 1 cup of tortilla chips on the bottom and top with half of the chicken mixture and half of the cheese. Repeat layers and cover with the remaining 1 cup tortilla chips. Bake until cheese is bubbly, about 30 minutes.

This is what my daughter's plates looked like. I rounded it out by making a cheese quesadilla on a whole wheat tortilla which they dipped in sour cream and some grapes.
Linked this recipe up with Join Aggie's Kitchen and Real Mom Kitchen.
Friday, September 2, 2011
Crunchy Buttermilk Baked Chicken

I hope everyone has exciting plans for Labor Day weekend. Mine aren't very exciting but should be somewhat relaxing which is okay be me. I am the kind of person that would rather stay home on holiday's. I would rather do my traveling when other people aren't...crowds just aren't my thing. My sweet little baby girl turns 5 this weekend so we will be celebrating her birth with a few activities of her choosing. I have a feeling these activities will involve doughnuts and swimming during the day and going to eat at Chili's in the evening. Does she know how to spend her birthday or what? I get a little sad when I think about how fast she is growing up. It seems like just yesterday we were bringing her home from the hospital all nervous about becoming first time parents. She is turning out to be such a wonderful, beautiful young lady girl.

Enough of that before I get too emotional. I stumbled upon this recipe and it is quickly becoming one of my new favorite ways to cook chicken. Like we don't have enough, right? I have had bad luck with boneless, skinless chicken becoming too dry when cooked in the oven. I almost gave up on trying till I saw this recipe and it intrigued me. Most recipes simply dip the chicken in buttermilk-which adds no buttermilk flavor. This one soaks the chicken in a highly seasoned buttermilk brine, which flavors the chicken deeply. This produced the most juicy, moist chicken I have ever made. I hope you enjoy and have a great holiday weekend.
Buttermilk Baked Chicken
recipe source Cook's Country Magazine
2 cups buttermilk
1/4 cup sour cream
1 envelope ranch seasoning mix
1 Tbsp salt
6 boneless, skinless chicken breasts (you could use bone-in chicken too but increase the cooking time)
5 slices hearty white sandwich bread, torn into pieces
BRINE CHICKEN Adjust oven racks to lowest and middle positions and heat oven to 450 degrees. Whisk buttermilk, sour cream, 2 Tbsp ranch seasoning, and salt in a large bowl until salt dissolves. Add chicken and toss to coat. Refrigerate, covered, 30 minutes or up to 1 hour.
MAKE COATING Meanwhile, pulse bread and remaining ranch seasoning mix in food processor until finely ground. Bake bread crumbs on rimmed baking sheet on middle rack, stirring occasionally, until light golden, about 5 minutes. Transfer to shallow dish.
COAT CHICKEN Line rimmed baking sheet with foil and spray lightly with cooking spray. Remove chicken from bowl (allowing excess brine to drip back into bowl) and dredge in bread crumbs, pressing lightly to adhere. Transfer coated chicken to prepared baking sheet and spray lightly with cooking spray.
BAKE CHICKEN Bake on lowest rack until bottom of chicken is golden brown, about 10 minutes. Move baking sheet to middle rack and reduce oven temp to 400 degrees. bake until chicken is golden brown and temp registers 175 degrees, about 20 minutes. Bone-in chicken will take closer to 25 or 30 minutes. Serve
This post is linked to Add a Pinch
Thursday, June 23, 2011
Tuscan Roast Chicken

Tuscan Roast Chicken
2 Tbsp chopped fresh rosemary
4 garlic cloves, thinly sliced
3 Tbsp olive oil
1 Tbsp lemon zest
3/4 tsp kosher salt
1/2 tsp crushed red pepper
6 bone-in chicken breasts
Preheat oven to 400 F.
Mix rosemary, garlic, oil, lemon zest, and red pepper in a bowl. Add the chicken and toss to coat.
Place chicken on a large rimmed baking sheet that has been covered with foil. Bake 45 minutes uncovered until chicken is browned and thermometer registers 170 F. Transfer to a platter and let rest for 5-10 minutes.
Tuesday, June 21, 2011
Whole Wheat Pizza Crust

I love making pizza at home. To me it is almost just as quick an easy as takeout. I love the fact that I can make it healthier and have it still taste awesome. We like to keep the toppings simple at our house, in fact one daughter will almost always remove her toppings and eat just plain cheese pizza. I love to experiment with different doughs and found a recipe I was anxious to try. This is a whole wheat dough that called for half all-purpose flour and half whole wheat. I just used all whole wheat white flour and it turned out great. I love this dough and will be using it a lot more often. It baked up nice and crisp and had great flavor. I used to be all about a thick crust but now I much prefer my crust to be more on the thin, crispy side. This dough was simple to make because you use rapid rise yeast. This means you can have your dough all ready to go into the oven within about 20 minutes, perfect for a weeknight meal. The recipe calls for using a food processor to mix the dough but I just used my Kitchen-Aid mixer. Just use whatever you want. I always use the same sauce recipe which you can find HERE. It is my go to sauce and I've never used any other recipe because it is so easy to make and delicious. I hope everyone is having a great week. Enjoy!
Whole Wheat Pizza Crust
recipe source Eating Well
To make 1 pound dough:
- 1 cup whole-wheat flour
- 1 cup all-purpose flour
- 1 package quick-rising yeast, (2 1/4 teaspoons), such as
- 1 teaspoon salt
- 1/2 teaspoon sugar
- 3/4 cup hot water, (120-130°F)
- 1 tablespoon extra-virgin olive oil
- Combine whole-wheat flour, all-purpose flour, yeast, salt and sugar in a food processor; pulse to mix. Combine hot water and oil in a measuring cup. With the motor running, gradually pour in enough of the hot liquid until the mixture forms a sticky ball. The dough should be quite soft. If it seems dry, add 1 to 2 tablespoons warm water; if too sticky, add 1 to 2 tablespoons flour. Process until the dough forms a ball, then process for 1 minute to knead.
- Transfer the dough to a lightly floured surface. Coat a sheet of plastic wrap with cooking spray and place it, sprayed-side down, over the dough. Let the dough rest for 10 to 20 minutes before rolling. I let mine rest for 20 minutes.
- Place a pizza stone or inverted baking sheet on the lowest oven rack; preheat oven to 500°F or highest setting. Roll and top the pizza as desired (we suggest a 13-inch circle) and bake the pizza until the bottom is crisp and golden, 10 to 14 minutes. Serve immediately.
- Make Ahead Tip: Store in a plastic bag coated with cooking spray in the refrigerator for up to 2 days. Bring to room temperature before using.

Monday, June 20, 2011
Spaghetti with Roasted Zucchini

I hope everyone had a wonderful weekend and Happy Father's Day. We are pretty low key in our festivities for these particular holiday's. Anyways, my husband ended up with a stomach bug of some kind so he wasn't up for any special Father's Day meals. He is much better today, hopefully the rest of our household doesn't catch it. I am very grateful to have such a wonderful father for my children and I get a bit teary eyed when I see the girls give him hugs and kisses and tell him they love him and Happy Father's Day.
I've got a quick and easy weeknight meal idea here for you today. I like to eat vegetarian a few nights a week. One reason is that it saves money but also it's healthy as long as you substitute plenty of vegetables in the place of meat. With this meal you don't miss the meat at all but you could add some chicken or shrimp if you wanted too. I enjoyed the smell of the fresh garlic roasting along with the zucchini. Roasted garlic is one of my favorite savory smells, cake baking would be my favorite sweet smell. Anyways, I hope everyone has a great Monday and enjoy your week.
Spaghetti with Roasted Zucchini
recipe adapted from Woman's Day magazine
12 oz spaghetti, I used whole grain
3 Tbsp olive oil
2 1/2-inch slices of fresh whole wheat bread, torn into pieces
2 cloves of garlic, smashed
4 small zucchini sliced 1/4 inch thick
kosher salt
1/4 cup grated Parmesan
1/4 cup flat-leaf parsley, chopped
1 Tbsp grated lemon zest
Heat oven to 425 F. Cook pasta according to directions. Drain the pasta and return to the pot. Toss the pasta with 1 Tbsp oil. Set aside.
Meanwhile, in a food processor, pulse bread and garlic until the bread forms coarse crumbs and garlic is chopped.
In a large bowl, toss the zucchini, remaining 2 Tbsp oil and 1/2 tsp salt. Add the Parmesan and bread crumb mixture and toss to combine. Spread zucchini mixture on 2 rimmed baking sheets and roast until the zucchini is tender and golden brown, 12 minutes or so.
Toss the pasta and zucchini mixture with parsley and lemon zest. Enjoy!
This post is liked to Mom's Crazy Cooking
Thursday, June 9, 2011
"Fried" Crispy Chicken

I had to force myself to turn the oven on. It is getting hot here much like everywhere else I'm sure. I'm just having a hard time lately cooking meals that are served warm. Like I've said in a previous post I just want to eat salads and fruit for every meal. My husband would not enjoy having a salad placed before him every night so like I said, I forced myself to turn the oven on and make this chicken dish. I will tell you that I loved it. It's a keeper for sure. I found this in Woman's Day magazine. The lady that submitted it said that this is what here mom would make before her tennis matches for good luck. This is a fun way to use the leftover Rice Krispies at the bottom of the bag. While we are on that subject, why does that always seem to happen in our house. There will be this Jumbo cereal box that is practically empty except for the tiny bit of cereal left at the bottom. Does this happen in anyone else's house or just mine. Anyways, the chicken turned out really moist, I'm guessing because it was marinating in yogurt and that acts as a tenderizer. I'll let you in on a little secret, I diced up some leftover's the following day and put them in a salad. I couldn't resist. I hope you are all having a wonderful week. It's almost weekend time!
"Fried" Crispy Chicken
Adapted slightly from Woman's Day magazine
4 cups Rice Krispies, lightly crushed
3/4 cup grated Parmesan Cheese
2 Tbsp olive oil
1 Tbsp paprika
1 tsp ground cumin
salt and pepper
1 cup lowfat plain yogurt
8 (6oz) boneless, skinless chicken breasts
Combine the yogurt and chicken breasts in a large resealable plastic ziplock. Allow to marinate for 1 to 4 hours.
Heat oven to 350 F. Line a baking sheet with foil or parchment paper.
In a shallow bowl or pie plate, combine rice cereal, Parmesan, oil, paprika, cumin, 1/2 tsp salt and 1/4 tsp pepper.
Press chicken breasts into the cereal mixture to help it adhere; place on the prepared baking sheet. Bake until golden brown and cooked through, 25-30 minutes.
Monday, June 6, 2011
Marinara Meatballs with Pasta

It's getting warm here in Arizona. I think we are in it for the next 3 to 4 months. What a great blessing the air-conditioner is this time of year. I will endure the hot summer because I know that from October through May we get to enjoy pretty nice weather. This time of year when it gets hot I tend to crave salad's. In fact, I've had a salad for the past 3 days in a row. It's very hard for me to eat heavy and hot things, even in the air-conditioning. I had a package of ground turkey in the fridge that needed to be used so I decided to make my favorite meatball recipe. I wasn't really craving them and I would have rather had another nice big salad but no lettuce could be found in the house. I have to say though they really hit the spot and I'm glad I made them after all. These are so quick and easy to make. I use ground turkey but you could use ground sirloin or hamburger meat if you prefer. When we were in California last week I stocked up on my favorite marinara sauce from Trader Joe's.

Marinara Turkey Meatballs with Pasta
1 lb ground turkey
1/4 cup dry breadcrumbs
1 egg
3/4 tsp dried basil
3/4 tsp garlic salt
1/4 tsp pepper
1/4 cup Parmesan cheese, grated
26 oz tomato basil marinara sauce or homemade
Dried pasta noodles of your choice (I used whole wheat)
Heat oven to 425 F.
In a bowl combine turkey, breadcrumbs, egg, dried basil, garlic salt, pepper, and Parmesan cheese; mix until just combined. Shape into 1 inch sized meat balls and place on a baking sheet that has been lined with foil.
Bake for about 15-20 minutes or until cooked through.
Bring a large saucepan of water to boil and cook noodles according to package directions.
Meanwhile, in a large saucepan combine the marinara and the cooked meatballs. Bring to a gentle simmer, cover, and turn heat to low. Allow to simmer for 15 minutes.
Serve meatballs and marinara over noodles and sprinkle with additional Parmesan cheese if desired.
This post is linked to Good Cheap Eats
Sunday, May 22, 2011
Cream Cheese Chicken Enchiladas
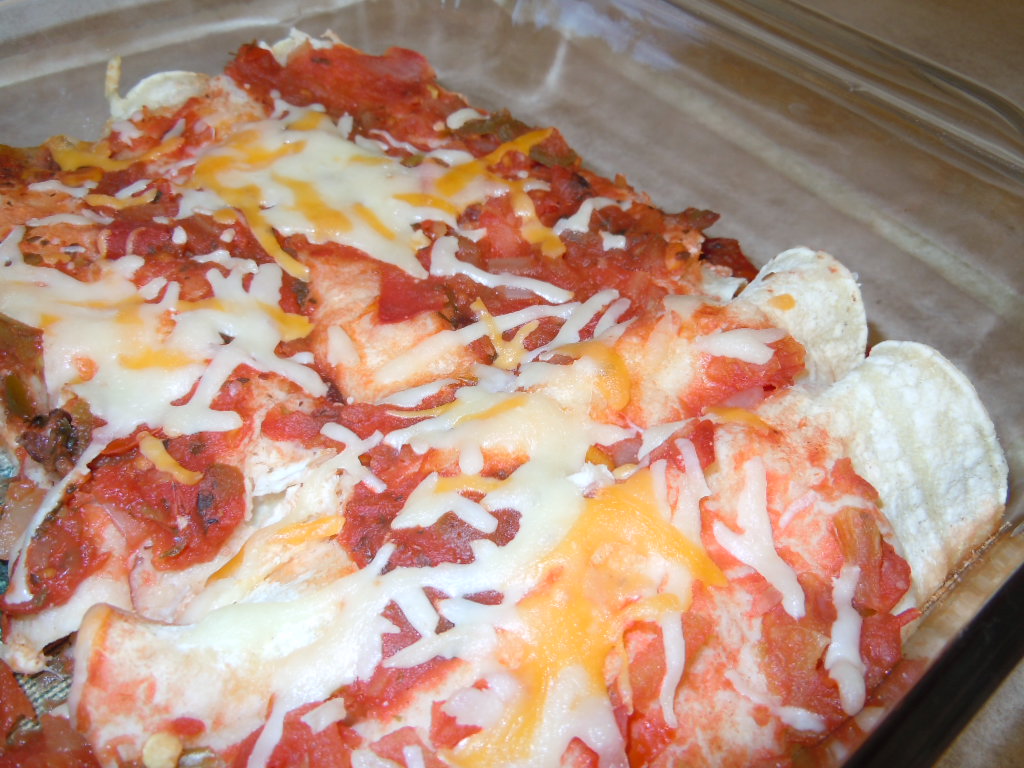
I was having another Mexican food craving and it just had to be satisfied. I was able to do just that with an exceptional recipe I found on a blog called Bun's in my Oven, slightly similar in name to my own blog. She just raved about this recipe and said that she makes it part of her dinner rotations quite often because it is one of her families favorites. I loved the idea of cream cheese mixed into the filling and was excited to try it out for myself. I adapted the recipe just a tad by adding black beans (my kids like them) and switching out the enchilada sauce for salsa. Oh, and I used plain Greek yogurt in the place of the sour cream. These did not disappoint me. I really, really liked them. I would say that I like them just as much as the Honey Lime Chicken Enchiladas I have on my blog. I used a mix of both corn tortillas and whole wheat flour tortillas. Either one will work for this recipe so use what your family likes best. I hope you enjoy and have a great week.
Cream Cheese Chicken Enchiladas
slightly adapted from buns in my oven
- 5 ounces cream cheese, softened
- 1/4 cup light sour cream or Greek yogurt
- 10 ounces enchilada sauce or 2 cups of salsa
- 1 cup shredded cheddar cheese, divided
- 1 cup shredded monterey jack cheese, divided
- 2 cups cooked shredded chicken
- 1 cup frozen corn kernels, thawed (canned corn works just fine, but drain it first)
- 1 cup black beans, drained & rinsed
- 4 oz. diced green chiles
- 1/2 teaspoon chili powder
- 1/4 teaspoon cumin
- Salt and pepper
- 4 scallions, thinly sliced
- 8 flour or corn tortillas
In the bowl of your mixer cream together the cream cheese, sour cream, and 1/2 of the enchilada sauce or 1/2 cup of the salsa. Stir in 1/2 cup of each type of cheese.
In a second bowl toss together the chicken, corn, black beans, cumin, chili powder, salt and pepper, green chiles, and half of the scallions. Add the chicken mixture to the cheese mixture and combine well.
Spread about half of the remaining enchilada sauce or salsa in the bottom of the baking dish.
Spoon the filling into each tortilla, roll the tortilla up, and place in the baking dish with the seam down. Pour the remaining enchilada sauce or salsa over the top of the filled tortillas and sprinkle with the remaining cheese. Bake for 20-25 minutes or until hot and bubbly. Sprinkle with the remaining scallions and serve.

Friday, May 20, 2011
Ham & Swiss With A Twist

I live in an area that gets pretty warm in the Spring & Summer. Well, the truth is it gets HOT!! So warm in fact that playing outside July, August, and September are pretty much off limits. This time of year I seem to crave either a big salad for dinner or a bowl of cereal and not much else. The past couple of days have been actually quite nice, a bit below the normal temperatures for this time of year. I decided it would be okay to fire up the oven to make this recipe that I found in Woman's Day magazine.
My husband loves his ham. Next to steak, it would be his meat of choice. This is a great way to use up leftover ham or even deli lunch meat ham from the grocery store. This is quick and easy to make. You just pair your ham with pizza dough for a savory supper that rolls right over its sandwich competition. You can either make your own pizza dough or buy the canned kind. I used my pizza dough recipe that you can find HERE. Add a salad or some fruit, we had watermelon, to round out this meal. I hope you enjoy and have a great weekend.
Ham & Swiss With A Twist
1 lb pizza dough (I used THIS recipe)
1 Tbsp whole grain mustard
1/2 lb thinly sliced ham
1/4 lb thinly sliced Swiss cheese
1/2 small onion, thinly sliced into rings
Heat oven to 400 F. Line a baking sheet with parchment paper. Roll the pizza dough into a large circle and spread with the mustard. Cut the dough into 8 triangles. Divide the ham, cheese, and onions among the triangles. Starting at the wide end, roll the dough around the filling (some of the filling will stick out).

Transfer the rolls to the prepared baking sheet and bake until golden brown, 20-25 minutes. Serve warm!
*The rolls can be prepared and refrigerated (unbaked) for up to 1 day.
Tuesday, May 3, 2011
Green Chile Chicken (Slow Cooker)

Cinco De Mayo is once again upon us. This gives me an excuse to make Mexican type dishes this week. I've mentioned before how I love Mexican food but only if cooked at home where I can have control over the ingredients, mainly the cheese. I have a weird aversion to globs of cheese and will gag at the very sight. I do love the spices that go into Mexican cooking. My favorite is cumin. Recipes that call for cumin will always be on my must try list. It just gives food a nice smokey flavor. I recently bought a huge bag of the stuff from My Spice Sage to insure that I don't run out anytime soon. This Green Chile Chicken uses lots of cumin so it is one of my favorite slow cooker meals. Another reason I like it is because it produces extra cooked chicken that I can bag up and freeze for leftovers. With my small family I am able to feed all of us and still have 3 bags of chicken for leftover meals. One chicken can go along way. Another plus is the fact that is cooks in the slow cooker all day so it makes dinner time really easy. I am able to take the chicken out, shred it, and pull all the fix ins out of the fridge for a quick and easy dinner. I hope you enjoy! Happy Cinco de Mayo.
Green Chile Chicken (Slow Cooker)
1 whole chicken
2 tsp chili powder
1/4 to 1/2 tsp pepper
1 tsp ground cumin
1 tsp salt
2 garlic cloves, minced
1 small onion, diced
1 (4) oz can diced green chile's
3/4 cup chicken broth
Wash chicken and remove skin and insides, pat dry with paper towel.
Rub outside of chicken with spices. Add garlic, onions, chile's, and broth to slow cooker. Place chicken on top. Cook on low for 8 hours.


Serve on tacos, burritos, quesadillas, taco salads, or any other way you wish.

Thursday, April 28, 2011
Crispy Baked Spinach Ricotta Ravioli

Another stuffed food recipe. Did you expect anything different? I am a big fan these won ton wrappers. Aren't they cute?

The possibilities are endless with what you could stuff into these babies. I keep seeing Nutella and peanut butter in my mind but haven't gotten around to experimenting with it. I know the I won't be able to stop thinking about that combo till I try. For now I have a fun appetizer idea for you. I had a big bag of spinach in my refrigerator that was going to expire so I knew I wanted to use it in some way for dinner. I also had a container of ricotta cheese. Spinach and ricotta pair up so nicely together so I decided to stuff the rounds with this combo. They ended up looking and tasting kind of like ravioli but a crispy version. I topped mine with a sprinkle of grated Parmesan cheese before baking. To serve these just warm up some marinara sauce (homemade or jar) to serve on the side for dunking. If your kids are anything like mine they will gobble anything up that gets to be dunked. This is a good way to get spinach in them. I think this would also make a great meatless main dish paired with a side salad and fruit. I hope you enjoy! Have a happy Thursday.
Crispy Baked Spinach Ricotta Ravioli
One package of Won Tons or Rounds
10 oz fresh spinach
15 oz ricotta cheese
3/4 cup grated Parmesan cheese or Pecorino Romano cheese plus more for sprinkling
1/4 tsp salt
1/4 tsp pepper
1/4 tsp dried oregano
1/4 tsp dried basil
olive oil for brushing
marinara sauce homemade or jarred
Cook spinach with 2 tbsp of water in the microwave or on the stove top for 5 minutes or until just wilted. Let cool and drain excess water. Place ricotta, spinach, grated cheese, salt, pepper, oregano, and basil in the bowl of a food processor and pulse until smooth. You could probably just do this by hand as well.
Line baking sheet with parchment paper, or spray sheet with non-stick cooking spray. Take a wrap and place approximately 2 tbsp of mixture in the center if each wrap. Do not place filling near the edge. Use a pastry brush dipped in water and brush edges of wrap. Place a second wrap on top, then crimp edges together tightly with your fingers or the tines of a fork. Brush ravioli lightly with olive oil and sprinkle with Parmesan cheese.

Bake in 375° F oven for 10-12 minutes or until lightly browned. Serve ravioli with your favorite marinara sauce for dipping.

Tuesday, April 26, 2011
Cheesy Ham & Broccoli Calzones (Leftover Ham?)

You know how I've been posting lots of food that is wrapped up in some kind of breading? Well, I'm not done and have another one here for you. Let me start by saying I have an awesome mother-in-law. She is a great cook and I always look forward to dinner over at her house. My father-in-law is pretty awesome too but don't expect him to make dinner for you, unless you are in the mood for popcorn as a main dish. We had a wonderfully delicious Easter dinner prepared by my as mentioned mother-in-law. The star of the show was the ham. I don't get too excited over ham, I like it but not a favorite. If there was a choice between turkey or ham I would go for the turkey. I do enjoy the smell of the ham baking in the oven though. This particular ham she made on Easter was so good and really hit the spot for me. We lucked out too because they were going out of town the next few days and didn't want any leftovers in the house. We were excited because this meant that we got to take them all home! SCORE! So I was left with all this ham and ready to make something yummy with it. I came upon THIS recipe for Calzones using leftover ham. I made them today and they were a big hit with my family. They were very simple too. You use a special yeast for pizza. Here is what the package looks like:

This is so simple. You just mix up the dough and don't have to worry about rising. It is ready to use right away. I found that the dough was way more easy to roll out than my other pizza crust recipes. There was none of that bounce back deal you get sometimes. The crust has a mixture of whole wheat flour in it to add some nutrition. They are easy to whip up and I know your family will enjoy them. Enjoy!
Cheesy Ham & Broccoli Calzones
recipe source Good Life Eats
No Rise Calzone or Pizza Crust:
1 1/3 cup warm water
2 packets Fleischmann’s Pizza Crust Yeast
2 tablespoons olive oil
2 teaspoons sugar
1 1/2 teaspoon salt
1 cup whole wheat flour
2 - 3 cups all-purpose flour
For the Calzone Filling:
1 3/4 cups diced ham
1 3/4 cups small broccoli florets, cut into bite sized pieces
6 ounces mild chedder cheese, shredded
2 - 3 green onions, sliced thin
1 tablespoon butter
3 tablespoons flour
10 ounces milk
1 cube or 1 teaspoon chicken bouillon
1/4 teaspoon pepper
1 1/2 tablespoon sour cream
For the Calzone Crust:
In the bowl of a stand mixer, add the warm water and yeast. Let stand for 5 minutes. After 5 minutes, whisk in the olive oil.
Meanwhile, combine sugar, salt, whole wheat, and 2 cups of all purpose flour in a bowl. Reserve the remaining 1 cup all-purpose in a separate bowl. Add the flour mixture to the water 1 cup at a time while mixing with the stand mixer's dough hook until a soft dough is formed.
If dough is still sticky, add the reserved flour 1/4 cup at a time (while still mixing) until desired consistency is reached. Dough should be soft and moist, but not sticky.
Dough does not need to rise, but keep it covered while you mix up the filling.
For the Calzone Filling:
Preheat oven to 500 degrees F.
Prepare the ham, broccoli, cheese, and green onion. Stir together in a medium-large bowl. Set aside.
In a small sauce pan, melt the butter over medium heat. Whisk in the flour until it has absorbed the butter. Slowly add the milk, whisking vigorously as you pour, until the sauce is thick and smooth. Add the bouillon and stir until dissolved. Season with pepper and, if desired, salt. Stir in the sour cream. Add the sauce into the ham mixture and stir to combine.
Divide dough into 8 equal portions and roll them into balls. It helps if you have a kitchen scale.
Roll each ball into an 8 inch circle on a lightly floured surface. Top each circle with approximately 1/2 cup of the filling mixture. Pull edge of lower crust over top to form a half circle. Press the layers together to seal.
Lower the oven temperature to 400 degrees. Transfer calzones to a greased baking sheet or a parchment lined pizza stone. If desired, brush with olive oil or an egg wash (1 egg + 1 tablespoon water, beaten). Bake at 400 degrees F for 10-20 minutes, until browned and puffy. Transfer to cooling rack to keep bottom crust crisp to sit until cool enough to handle.
Note: To freeze - cool completely, then store in a freezer safe ziploc bag in the freezer for up to a month. Defrost in the refrigerator and reheat in the oven or toaster oven at 300 degrees F.

This post is linked to At Home With Haley
Thursday, April 21, 2011
Chicken Pillows

I seem to have a bit of an obsession lately. I have a strong desire to wrap my food up in some kind of manner. Whether it be the Stuffed Pizza Rolls, the Cheeseburger Flatbread Melts, the Southwestern Egg Rolls, or the Chicken Taquitos (you get the picture). Watch out, I'm not done yet! These Chicken Pillows are no exception. What can I say? I love them, they are awesome, and I can't wait to make them again soon because I am already craving the delicious filling that comes oozing out when you take a bite of the flaky crescent roll. This is my take on a similar recipe I found over at The Girl Who Ate Everything. I changed it up a bit to make them somewhat more healthy, hey I gotta try. She dipped hers in melted butter and rolled them in dry breadcrumbs before baking. I skipped this step because crescent dough is already quite buttery and rich. She also serves hers with a chicken type gravy. I also skipped this step because I didn't like the thought of a soggy pillow. I will include her recipe for the gravy in case you are interested in that part. I think a nice side salad or side of fruit would be the perfect side dish with these to make them a light Spring or Summer meal. I hope you enjoy!
Chicken Pillows
adapted slightly from The Girl Who Ate Everything
8 oz cream cheese softened, I used 1/3 less fat
1/2 cup sour cream
1/2 tsp salt
1/4 tsp pepper
1 1/2 Tbsp dried chives
1 1/2 Tbsp minced fresh onion
5 oz frozen spinach, thawed and squeezed dry
3 chicken breasts cooked, diced really small
2 (8oz) cans Pillsbury Crescent Dough
GRAVY if desired:
1 (14.5 ounce) can cream of chicken soup
1 (0.87) package chicken gravy mixPreheat oven to 350 degrees.
Using a hand mixer, beat cream cheese and sour cream until well combined. You can do this by hand if your cream cheese is soft enough. Stir in salt, pepper, onion, chives, spinach, and diced chicken.
Using Pillsbury crescent rolls, take 2 triangular rolls and push together at perforated seam to make into a square. Make sure you seal the perforations well so your filling doesn't come out. Put about 3 tablespoons of chicken mixture in the center of each square. Fold the dough corners to the center over the chicken mixture forming a pillow.

Place chicken pillow on cookie sheet and bake at 350 degrees for 20-25 minutes.

Make gravy by mixing one package of chicken gravy mix, one can of cream of chicken soup and 3/4 can of water in a small pot. Mix together and heat until warm. Serve chicken pillows with gravy poured over top.

This post is linked to a Linky Party over at MOMS CRAZY COOKING!
Monday, April 18, 2011
Stuffed Pizza Rolls

Let's face it, kids love to dip their food. My 4 year old will even drink it or use her spoon to slop up any remaining dip from her plate. It's kind of gross to me but whatever. I've got a fun recipe that lets your kids "dunk" their pizza so they are very kid friendly. This recipe comes from one of my favorite food blogs Our Best Bites. These ladies are amazing and create some wonderful recipes. They say you could use a store bought crust such as Pillsbury but I opted to make my own. Have you seen how expensive those cans of dough are? I actually used their pizza crust recipe which you can find HERE and I have to say that I used half white whole wheat flour and half all-purpose flour to sneak in a little fiber. These are very versatile. You can stuff them with any of your favorite pizza toppings. I opted for my favorite, Canadian bacon and pineapple. I had a bit of worry when I pulled my mozzarella cheese from the fridge and saw mold. EEK! Not gonna use that. I saw a package of string cheese sitting there and diced them up instead. I thought they were great and would probably use them again. If you have a family that likes different things you could even do half one topping and half another. So, just in case you need instructions on how to eat these babies, you just pop one off and dunk it in the pizza or marinara sauce. Enjoy!
Stuffed Pizza Rolls
Recipe Source Our Best Bites
1 roll refrigerated pizza dough* or make your own
marinara/pizza sauce or make your own (click HERE for mine)
2T grated Parmesan cheese
1 T olive oil or melted butter
1/2 t garlic powder
1 t dried Italian seasoning
mozzarella cheese, diced or grated (I used string cheese)
Pizza toppings of your choice: ie, ham and pineapple, pepperoni slices, sausage, etc.
*You can use regular pizza dough, or thin crust.
1 T olive oil or melted butter
1/2 t garlic powder
1 t dried Italian seasoning
mozzarella cheese, diced or grated (I used string cheese)
Pizza toppings of your choice: ie, ham and pineapple, pepperoni slices, sausage, etc.
*You can use regular pizza dough, or thin crust.
Preheat oven to heat specified on pizza dough package. Usually it's 400 degrees. If you make your own dough, 400 is usually a good heat as well.
Unroll your pizza dough onto a lightly floured surface. Pat or roll the dough so it's about 12" by 8". You're going to want to cut it into 24 squares, so just eyeball it if you need to. Use a pizza cutter to slice the dough into 24 squares.

Place cheese and desired toppings on each square. (Note that you're not putting the marinara sauce on the dough- it's for dipping after). You just need to be able to enclose the toppings in the dough so keep that in mind.

When all of your dough squares have cheese and toppings on them, carefully lift up each square and wrap the dough around the toppings. Pinch to make sure each ball is sealed shut and then place them seam side down in a lightly sprayed pie pan (or similar sized dish).
Brush the tops of the dough balls with olive oil or melted butter and then sprinkle with the garlic and Italian seasoning and top with Parmesan cheese.

Cook them in the oven for about 15-20 minutes or until golden brown on top. Keep an eye on them! Doughs vary, so I'd check them after even 10 minutes.
Serve warm with warmed marinara sauce on the side for dipping.
Serve warm with warmed marinara sauce on the side for dipping.

Fruit is the perfect side dish.

Thursday, April 14, 2011
Cheeseburger Flatbread Melts

I like coming up with different ways to make ordinary food. Take your typical cheeseburger for instance. Everyone is used to eating a grilled patty with cheese between a bun. They are always a favorite of just about everyone, but nothing special or unique. This recipe is a twist on the old favorite. The meat has all the flavor of a cheeseburger because it is simmered with ketchup, mustard, and onion. It is served on delicious buttery flatbread rather than a bun and topped with shredded cheese. I think that if your family loves burgers they will enjoy with unique way of eating them. They are easy to throw together so you can have dinner on the table quick. I added some black beans to stretch the meat and add some fiber. What's not to love? I found this recipe over at Kevin & Amanda. It is a great blog if you have a chance to check it out. She gave some other ideas for the use of flatbread such as:
Cheeseburger Flatbread Melts
slightly adapted from kevinandamanda.com


Tuesday, April 12, 2011
Southwestern Egg Rolls (Baked)

I have a new obsession. I used to see these little things in the produce section all the time and wondered what fun things I could do with them. I finally broke down and bought some one day. I am so glad I did. Do you want to know what I am talking about? Well here they are:

Egg roll wraps are wonderful. You can adapt them to fit just about any cuisine whether it be Italian, American, Mexican, Asian, you name it. You can even wrap up something sweet and make a killer dessert. I am excited about experimenting with that more in the future. I found a recipe in a Taste of Home magazine for a Southwestern Style Egg roll and I adapted it a bit to suit our family more. For one thing, it called for spinach which I like but I didn't think my kids would like seeing that stringy green stuff when they bit into them. I also left out the green onions and the cayenne pepper because I did want my children to actually eat them. The original didn't have chicken in it but I added it because this was dinner for us and I wanted something more substantial. You can see how you can make these to suit your families tastes. My kids actually wanted ketchup to dip them in (GAG). Just do what you want and enjoy!
Southwestern Egg Rolls (Baked)
adapted from Taste of Home Magazine
1 (15 oz) can sweet corn, drained or 2 cups frozen corn, thawed
1 (15 oz) can black beans, rinsed and drained
1 (4 oz) can diced green chilies
1 cup cooked, shredded chicken
1 cup shredded Mexican style cheese
1 tsp ground cumin
1/2 tsp chili powder
3/4 tsp salt
1 (1lb) package egg roll wrappers
In a large bowl, mix everything together except for the egg roll wrappers. Lay an egg roll wrapper on a work surface so that one of the corners is facing you. Place 1/4 cup of the filling in the center like so:

Now fold the tip closest to you up over the filling like this:

Now fold the points pointing outward in towards the center to resemble an envelope:

Now continue to fold over until a small part of the remaining tip is showing. Moisten the edges with water and finish rolling to press the seal closed. Repeat with remaining wrappers and filling. Place them on a greased baking sheet seam side down. Spray the tops with cooking spray and sprinkle with a light sprinkling of salt.

Bake in a preheated 425 F oven for 12-15 minutes until lightly browned. Make sure to turn halfway through baking to brown evenly. Serve with salsa, sour cream, or guacamole.
Makes about 18-20
This post is linked to At Home With Haley & Moms Crazy Cooking
 Labels:
Appetizers,
Beans,
Chicken,
Healthy,
Kid Friendly,
Main Dish,
Mexican,
Quick and Easy
|
Labels:
Appetizers,
Beans,
Chicken,
Healthy,
Kid Friendly,
Main Dish,
Mexican,
Quick and Easy
|
 4
comments
|
4
comments
|
Wednesday, April 6, 2011
Garden Patch Cannelloni

I have a new FAVORITE!! This is going to be in our dinner rotation from now on. I had bought a container of ricotta cheese for a slow cooker version of lasagna. For some reason I kept putting it off worried about how it might turn out. I was thinking in my head about something else that I might want to make instead. I had a container of mushrooms (my favorite veggie) in the fridge and wanted to use them up before they went bad. I found a recipe over at Taste and Tell that gave me a lot of inspiration. I changed things up a bit and am very pleased with the results. This is so good. I almost had some more for dessert tonight. The best thing about this cannelloni is that it is healthy and full of vegetables. It's another great way to get those veggies into your kids. This is also simple to make using softened no-boil lasagna noodles as the cannelloni shells. You just have to roll the filling up inside. So here is a simple vegetarian, and healthy meal to serve your family.

Garden Patch Cannelloni
adapted from Taste and Tell
Filling:
2 tablespoons olive oil1 small onion, chopped
2 small carrots, shredded
1 garlic clove, minced
3 cups fresh spinach2 cups sliced mushrooms
15 oz container ricotta cheese
1/2 cup shredded mozzarella cheese
1/4 cup shredded Parmesan cheese
1 large egg, beaten
1 teaspoon dried basil
1/2 teaspoon dried oregano
1/4 teaspoon black pepper
1/2 teaspoon salt
1 box No-Boil Lasagna Noodles
1 container of marinara sauce (store bought or homemade)
1 1/2 cups shredded mozzarella cheese (for topping)
Make the filling: Heat the olive oil in a large saute pan over medium-high heat. Add the onion, carrots, and garlic and cook until tender. Stir in the spinach and mushrooms. Cook until the mushrooms are soft and the spinach is wilted; remove from heat. While it is cooking, combine the ricotta, mozzarella, and Parmesan in a large bowl. Add the egg and mix in. When the spinach/mushroom mixture is finished cooking, mix it in along with the seasonings. Set aside.
Bring a large pot of water to a boil and season with salt. Add the pasta and cook for 5 minutes. (The noodles will not be cooked all the way through, but will finish cooking in the oven.) Carefully remove them from the water and lay them flat on a wire cooling rack.
To assemble: Take about 1/2 cup of the marinara sauce and spread it in the bottom of the prepared baking dish. Spread about 3 Tbsps of the ricotta mixture on the short side of each lasagna noodle roll up the noodle. Transfer to the baking dish with the seam side down.


Continue will all of the noodles and filling. Top with the remaining sauce and the mozzarella cheese. Cover pan with foil.

Subscribe to:
Posts (Atom)


 Posts
Posts


- momof2girls
- One of the many jobs I have as a stay at home mom is to cook. I love being in the kitchen and creating yummy dishes to feed my family. I started this blog as a way to virtually capture my most valuable recipe creations and finds. I hope you enjoy!


